
Today is FINALLY the day, and if you’re anything like me, you’ve spent the better part of the last two days in the kitchen. Prepping, chopping, peeling, baking, roasting, and doing everything in your power to ensure the meal turns out perfect for your family and friends. Having exhausted all that time and effort, the most important thing you can do is to give the star of the meal (your turkey) the right treatment.
Forget the Norman Rockwell painting, and every movie and TV show you’ve seen that tells you hacking away at the side of the breast and carving with the grain is the way to go. Going down this road is a slippery slope, it leads to dry, tough, stringy meat, in a pile on your platter, and a lot of wasted (delicious!) meat on the turkey or worse. Think of that scene in “Little Fockers” where Greg destroys the turkey and loses his thumb. Don’t be Greg.
Fortunately for all of us there is a better way, which will allow us to carve the meat against the grain. One final tip before we get started, do not start carving your bird the moment it comes out of the oven. Allow it to rest on a sheet pan, tented with tin foil for at least 30 minutes to let the juices redistribute and reabsorb back into the meat. Skipping this will cause the turkey to weep its juices and become very incredibly dry. Reserve any drippings that run into the sheet pan for use in your gravy.
Tools Needed:
• Two large cutting boards
• One large sheet pan
• 8” chef knife or 8” carving/slicing knife (the sharper your knife the better)
• Tongs
• Large platter for serving and display
• Herbs, dressing (stuffing,) and/or roasted vegetables for garnish
Directions:
1. Once the bird has rested, remove any dressing (stuffing) and the tented foil, and place onto one of your cutting boards. Face the front (neck side) of the bird towards you. Use your knife to trace down and cut where the wish bone is, once done, remove the wishbone. Turn the cutting board around, allowing the legs to point at you.
2. With the legs facing you. Starting with the right leg, push it to the side, flat onto your cutting board. Using your finger, find where the thigh connects to the body. Once located, pick up your knife and press down between the joint and remove the leg and thigh, set aside. Repeat this process for the left leg.
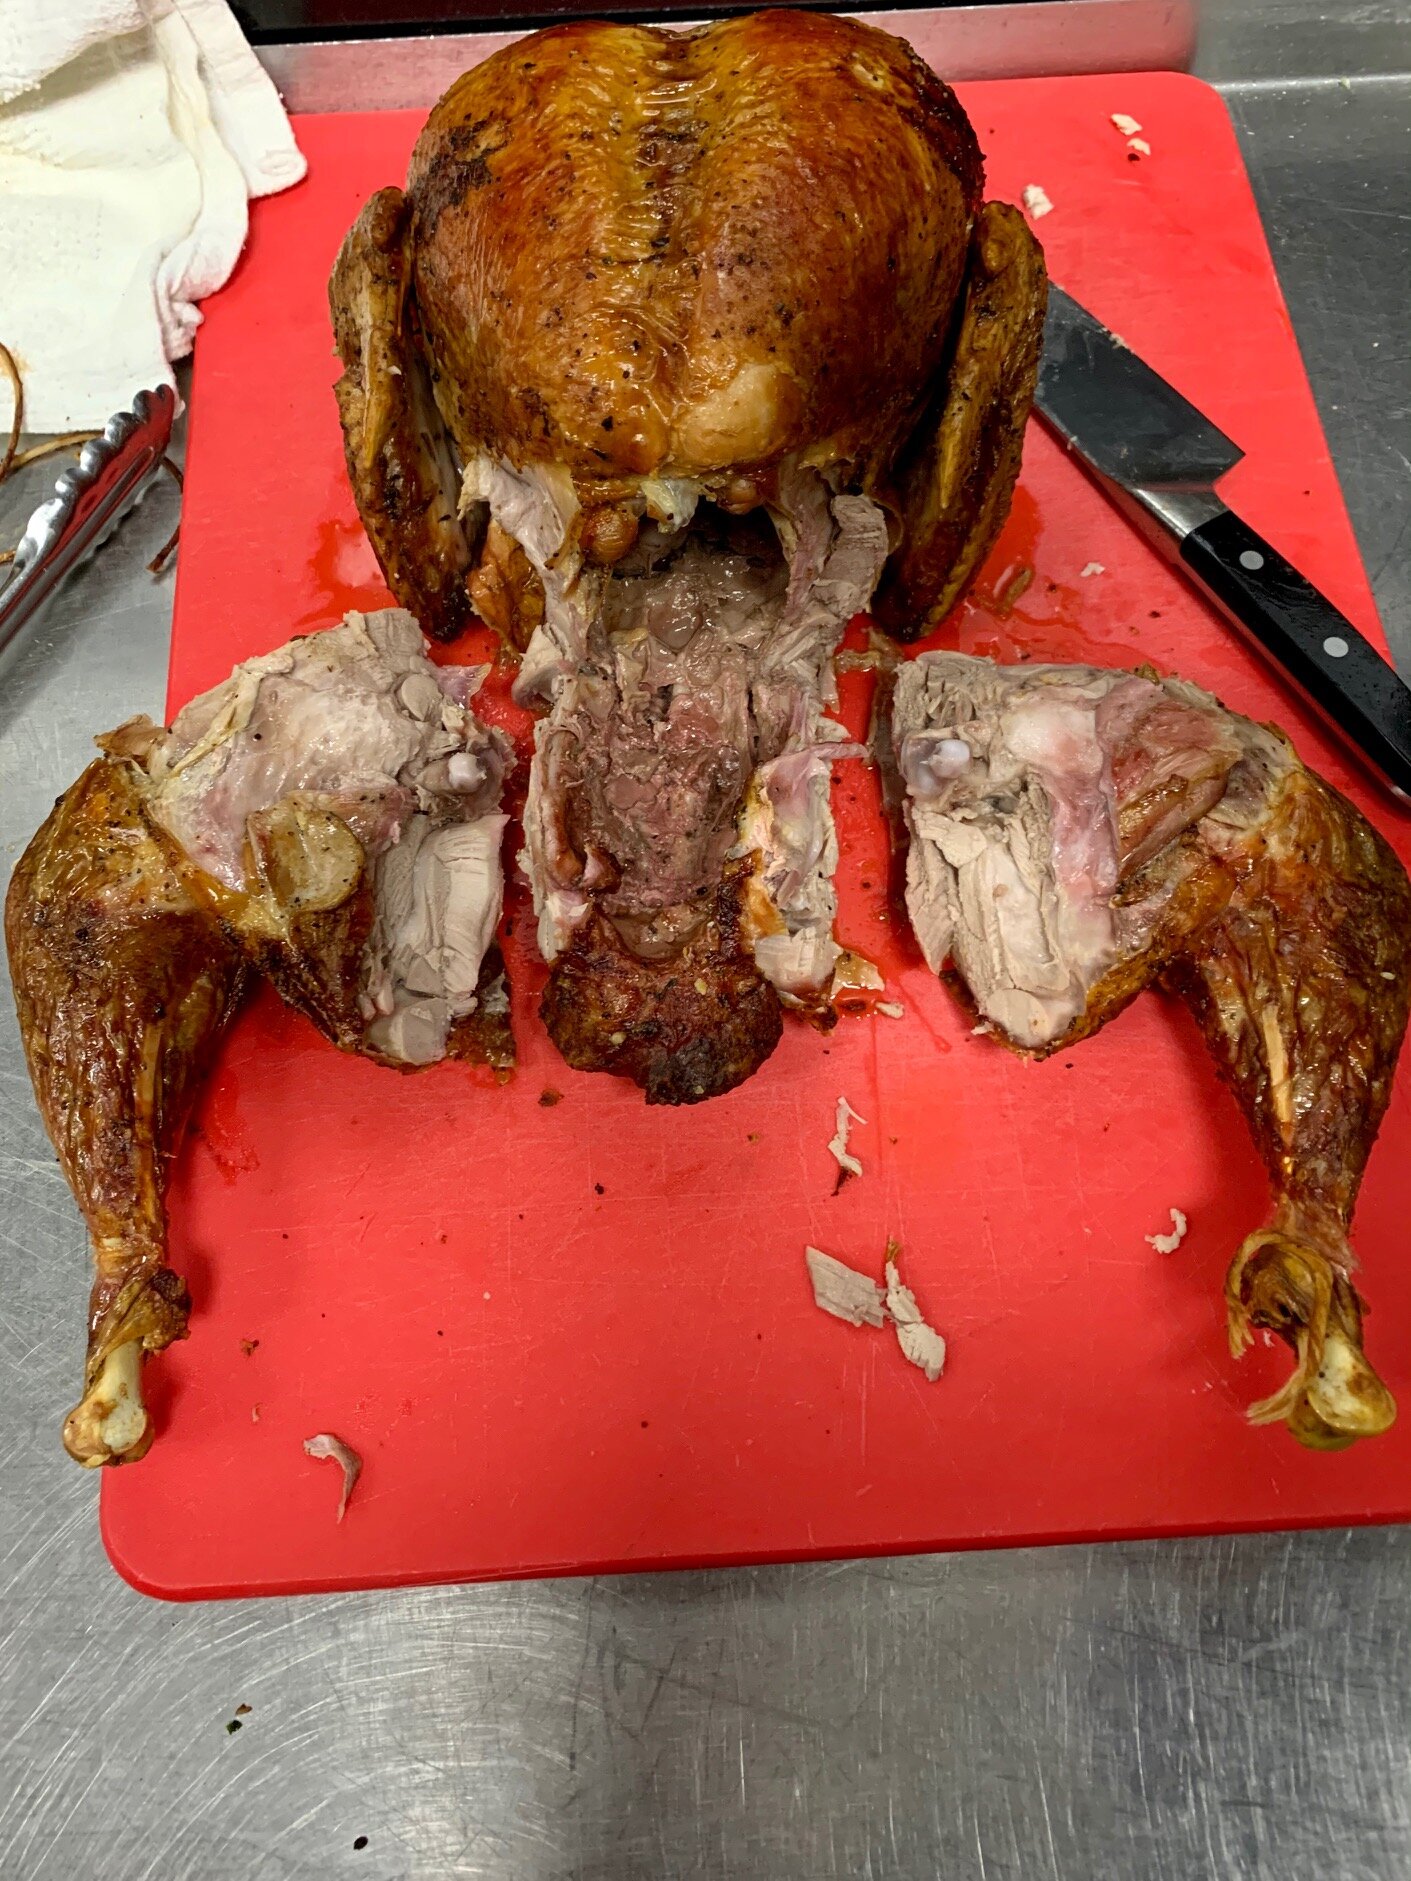
3. Once both legs are removed, take one and place your knife between the joint connecting the thigh, and drumstick (if you are unsure where it is, you can use your finger to find this again before picking up your knife.) Repeat this process with the other leg. Place your drumsticks on your large serving platter. You can leave the bone in your thighs, however, if you prefer to carve them do the following.
a. (Optional) Flip the thigh over and using the tip of your knife trace the bone, cutting through the meat exposing it. Use your index finger to lightly pull the bone away, and discard. Flip the thigh over, and carve against the grain, keeping as much skin as possible. Place the carved, or uncarved thighs on your platter.
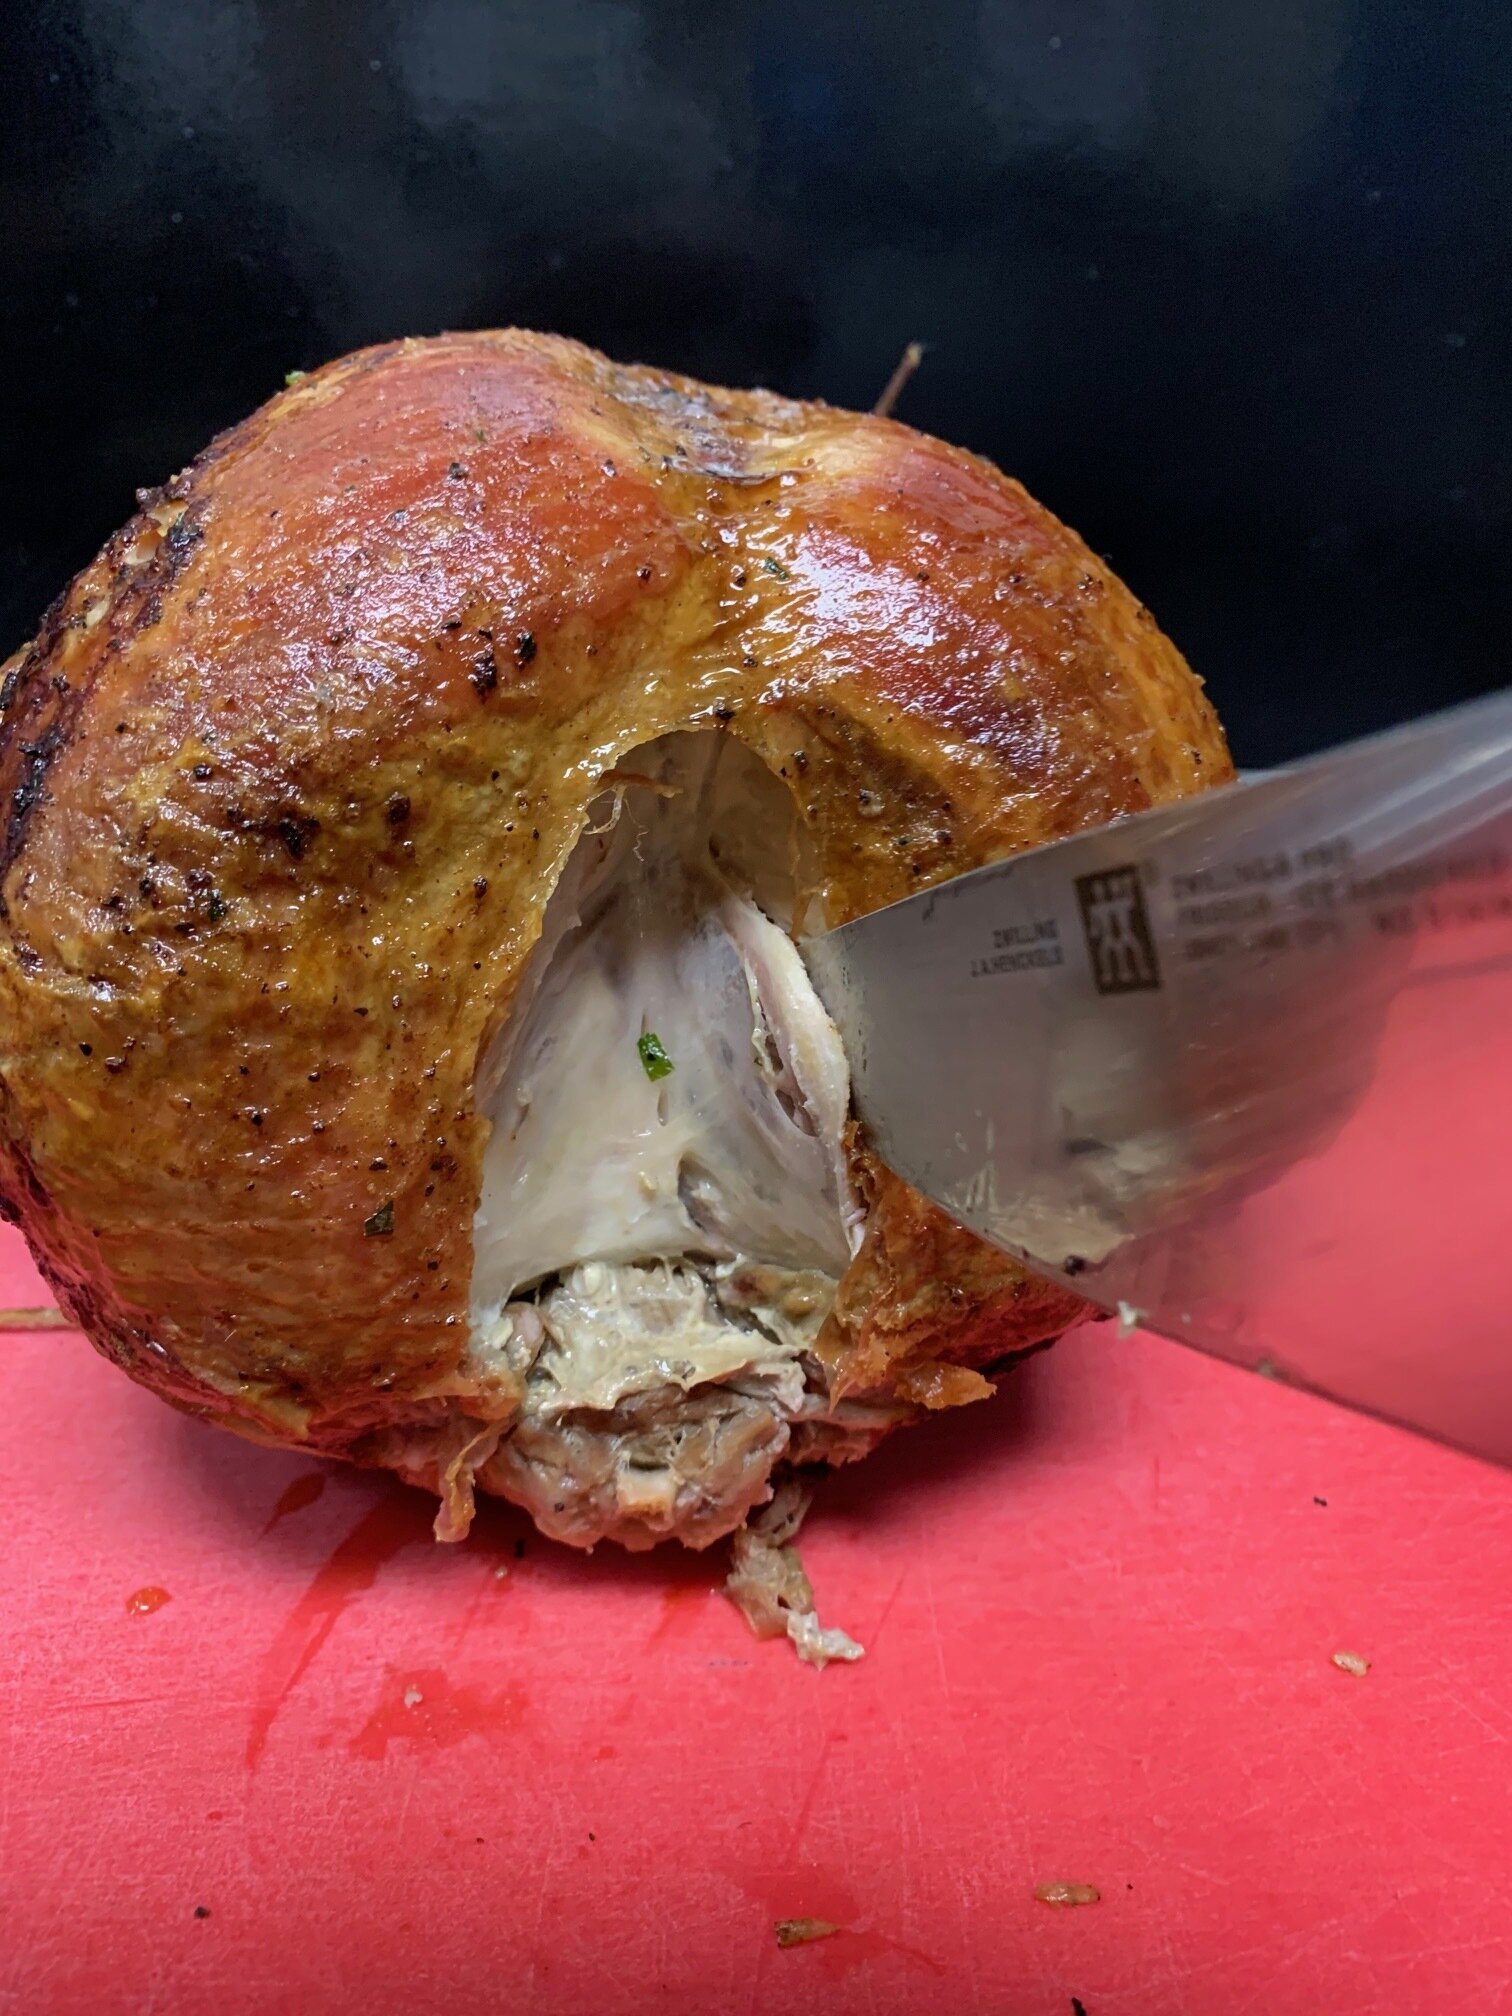
4. Holding the turkey steady with your tongs, take your knife, and slice a line at the crown of the turkey between the two breasts, starting at the neck, and working your way back towards yourself. Use your tongs (or fingers) to pull one of the breasts slightly away from the carcass. Again, using the tip of your knife, carefully slice downwards, following the line of the breastbone to completely slice the breast away. Once you’ve reached the bottom, cut slightly to the outside to finish removing the breast and set aside. Repeat the process for the other breast.

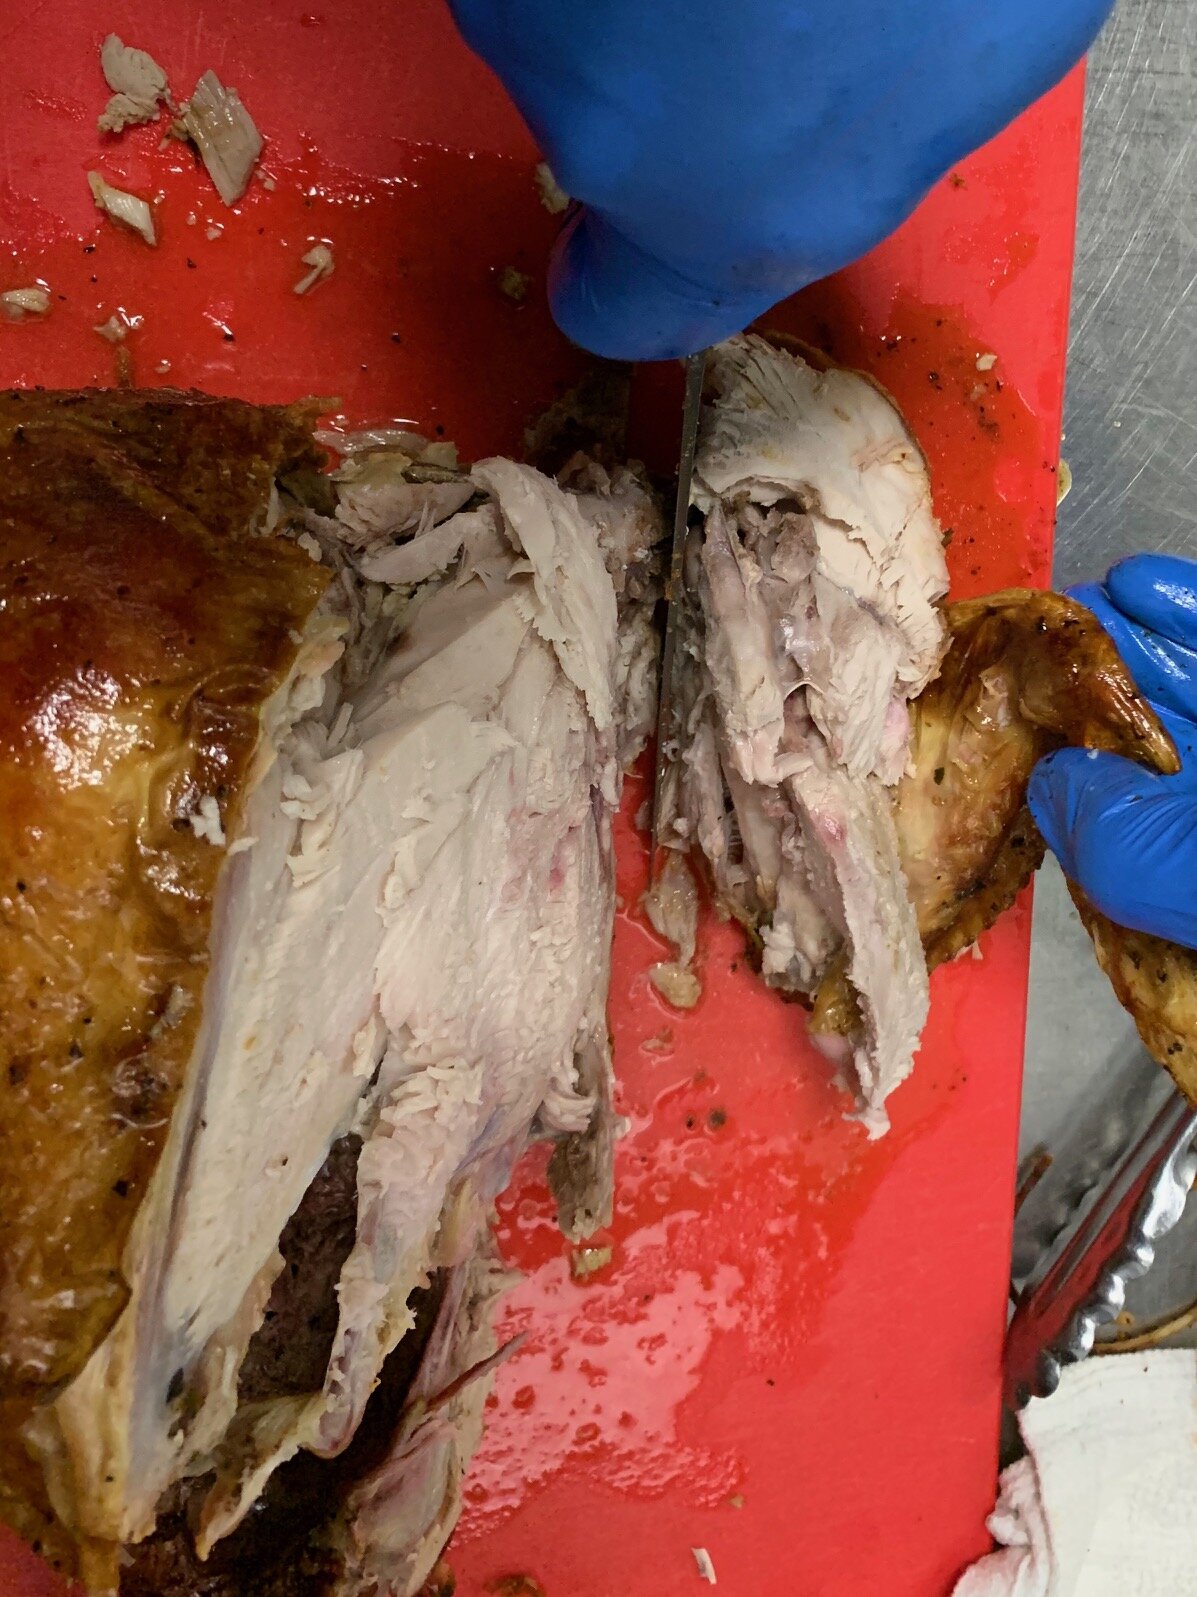
5. Place both of your turkey breasts on the cutting board running the long way. Carefully slice the meat (against the grain!) as thick or thin as you prefer (pro tip: the sharper your knife, the cleaner your cuts will be allowing you to keep the skin mostly intact around the meat, and the thinner you will be able to carve your meat.) Fan the meat out to follow the shape of your platter and place it on to the plate.
6. Using the same method we used to remove the leg, we’ll pull the wings. Find the joint, and slide your knife between, pressing down to split it, and cutting through separating the whole wing from the body. It is your choice whether to split the whole wing, into the wingette and drumette (like chicken wings) or serve whole. On a turkey, I prefer to keep it whole. If you would like them split, just follow the same pattern we’ve done before by splitting them at the joint, and place onto your platter.
7. Finally, flip what is left of the bird over, and slice off any remaining dark meat left on the back side (between the joint where you removed the legs and wings) and place this onto your platter.
If all has been done correctly, you should end up with a nearly bare turkey, that will make a great broth for soup and stock! Garnish your freshly carved bird as you see fit, not being afraid to really dress up the plate with fresh herbs, stuffing, or roasted vegetables. Grab your platter and stroll confidently into the “oooooohs” and “ahhhhhhhhs” of your waiting guests.
Don’t let these steps intimidate you, this is not a difficult process. But with a small change you will wind up with a much more quality, tender meal, that everyone will enjoy!
